


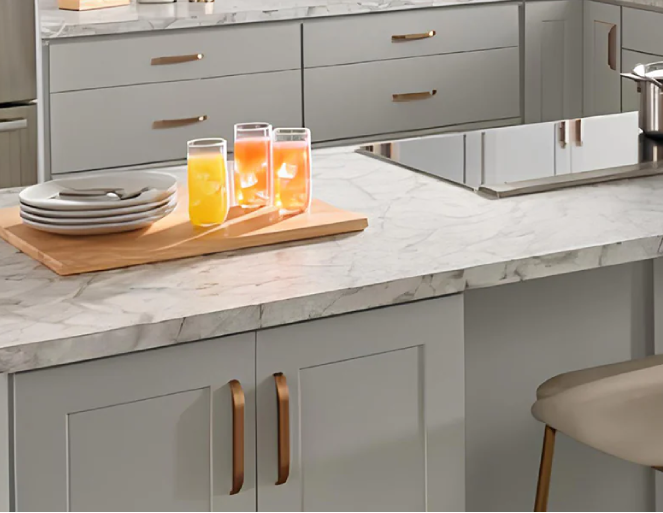

How to Build a Kitchen Island With Base Cabinets
Quick answer: Line up standard 24 in. deep base cabinets in a row, back them with finished panels, or a second row of cabinets, and add end panels on the exposed sides. Anchor the cabinets to the floor with wood cleats, then top it with a countertop that overhangs about 12 in. on the seating side. Leave at least 36 in. and ideally 42 in. of walkway around the island, or 48 in. if two people cook at once.
A kitchen island adds prep space, storage and seating, and you don't need a custom piece to get one. Most islands are built from the same stock base cabinets used along the walls. With the right layout and finishing pieces, the result looks fully custom.
Step 1: Check that you have room
Before you choose cabinets, make sure the island fits.
| Clearance | Recommended |
|---|---|
| Walkway on any working side | 42 in. for one cook |
| Walkway with two cooks | 48 in. |
| Minimum walkway (tight spaces) | 36 in. |
| Behind seating, with people walking past | About 44 in. or more |
Quick math: room width minus wall cabinet depth (24 in. per side) minus walkways equals the island depth you can fit. For example, a 13 ft. (156 in.) wide kitchen with base cabinets on both walls: 156 - 24 - 24 - 42 - 42 = 24 in. That's room for an island one cabinet deep.
Step 2: Choose your island size
| Island type | Typical size | Cabinets |
|---|---|---|
| Small prep island | About 48 x 25 in. | One or two base cabinets |
| Standard island with seating | About 72 x 38 in. | Two or three base cabinets plus overhang |
| Large island | 96 in. or longer | Cabinets on one side, cabinets or panels on the back |
A wide double-drawer base is the backbone of many islands. Our best-selling Fabuwood Allure Galaxy Frost 42 in. Double Door/Double Drawer Base gives you two drawers and a large cabinet below in one box. Add a drawer base on one or both sides to reach your target length.
Step 3: Plan storage and seating
Islands usually have a working side and a seating side.
- Working side: base cabinets with drawers for utensils, pots and pans. Doors with roll-outs work too.
- Seating side: a finished back panel with a countertop overhang for stools.
- Double-sided storage: in a deep island, set a second row of cabinets back to back, or use shallower cabinets on the seating side.
Seating overhang: - Counter height (36 in.): about 12 in. of overhang, with 24 in. of width per stool. - Bar height (42 in.): about 12 in. of overhang on a raised top. - Overhangs larger than about 10 to 12 in. usually need brackets or corbels. Follow your countertop fabricator's guidelines.
Step 4: Finish the exposed sides
Shoppers often forget this step. On an island, every side shows, so the back and ends of the cabinets need finished surfaces.
- End panels: cover the cabinet sides at each end. For the Galaxy Frost line, there's a matching 3/4 in. Base End Panel.
- Back panels: cover the back of the cabinets on the seating side. Use a full panel or a decorative door panel style from the same line.
- Toe kick: run a matching toe kick around all exposed sides.
- Fillers: use matching fillers, like the Galaxy Frost 3 in. base filler, to fine-tune the length or create space for end panels.
Browse the full line in our Fabuwood Allure Galaxy Frost collection.
Step 5: Anchor the island
An island isn't attached to a wall, so it must be secured to the floor.
- Mark the footprint on the floor, including the toe kick setback.
- Screw 2x4 cleats to the floor just inside the cabinet footprint.
- Set the cabinets over the cleats, level them with shims and screw through the cabinet bottoms or sides into the cleats.
- Fasten cabinets together through the face frames or side walls so the island acts as one unit.
- Add panels and toe kick, then install the countertop.
Step 6: Plan power and plumbing early
If your island will have a sink, dishwasher, cooktop or outlets, plan the utilities before the floor is finished.
- Outlets: local electrical code often requires outlets on islands. Check with your electrician.
- Sink: an island sink needs a drain and venting under the floor.
- Cooktop: a cooktop needs dedicated power or gas and ventilation.
Utility runs are much easier before flooring goes down.
Example island layout
A 90 in. island from stock cabinets:
- 24 in. three-drawer base
- 42 in. double door/double drawer base
- 24 in. three-drawer base
- End panels on both ends, plus a back panel for seating
- 96 x 38 in. countertop with a 12 in. seating overhang
Use one of the free kitchen design tools to sketch it out, and see small space, big style if you're working with a compact kitchen.
FAQ
Can I use regular base cabinets for a kitchen island? Yes. Most islands are built from standard 34 1/2 in. tall, 24 in. deep base cabinets with finished panels on the exposed sides.
How much space do I need around a kitchen island? Plan on 42 in. of walkway for one cook and 48 in. for two. Don't go below 36 in.
How much overhang do I need for island seating? About 12 in. at counter height. Larger overhangs need support brackets.
How do I finish the back of an island? Use a matching back panel or decorative panels from the same cabinet line, plus end panels and toe kick.
How do I keep an island from moving? Screw 2x4 cleats to the floor and fasten the cabinets to them.
What is the minimum size for a kitchen island? A compact island can be about 48 x 25 in., but only if you still have proper walkway clearance around it.